
iTemplating

3
Select calibration marker
-
Use the drop-down to select your calibration marker, then press Next.
.png)
-
Open your de-identified x-ray on your computer.
-
During templating, your mobile device must be parallel to the computer screen.
-
For more stability, try resting your device vertically on an elevated surface.
1
Setup


2
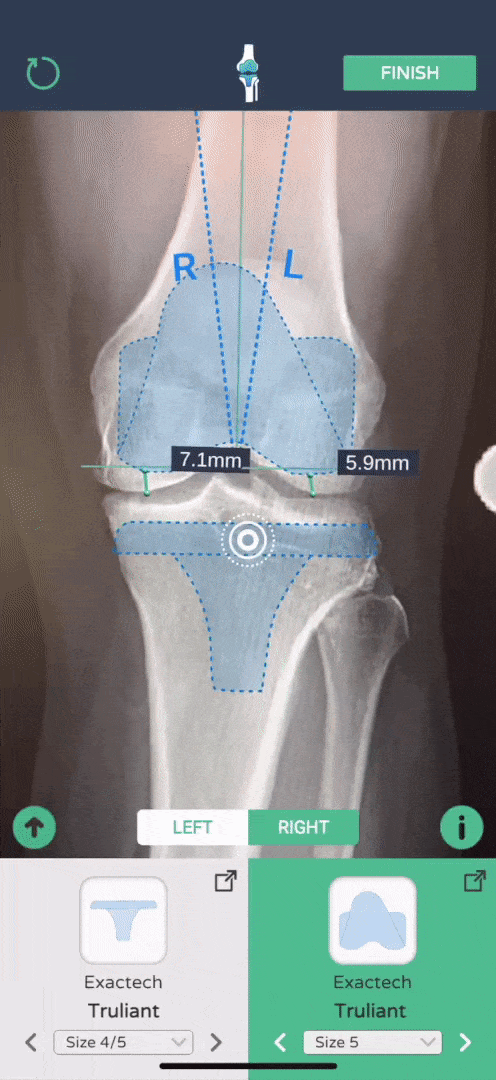
Select your implants
-
Select Knee or Hip.
-
Use the drop-down to select your manufacturer and implants.
-
For Knee, select AP or Lateral.


4
Activate augmented-reality (AR)
-
To activate AR, have your device vertically in front of your computer screen and move it slowly until the AR target appears.
-
Templating is only active when the AR target is on the center of app screen.
-
Once the AR target is active, press Calibrate to make an AR marker appear on your screen.
-
Drag the AR marker using 1 finger to position it over the x-ray calibration marker.
-
Rotate the AR marker by dragging 2 fingers vertically up or down on the screen.
-
Zoom in or out of the x-ray on your computer screen until both calibration markers are the same size.
-
Once calibration is complete, press Next and do not change the x-ray magnification on your computer during templating.
-
TIP: Skip this step for future x-rays taken by the same x-ray machine by recording your calibrated magnification.
5
Calibrate your
x-ray


6
Header Menu
-
Use the Reset icon to clear your screen and restart your template. Tip: Resetting allows you to confirm your calibration.
-
Use the logo icon to return to the home screen.
-
Press Finish to save your template to your device photos.