
iTemplating

3
3
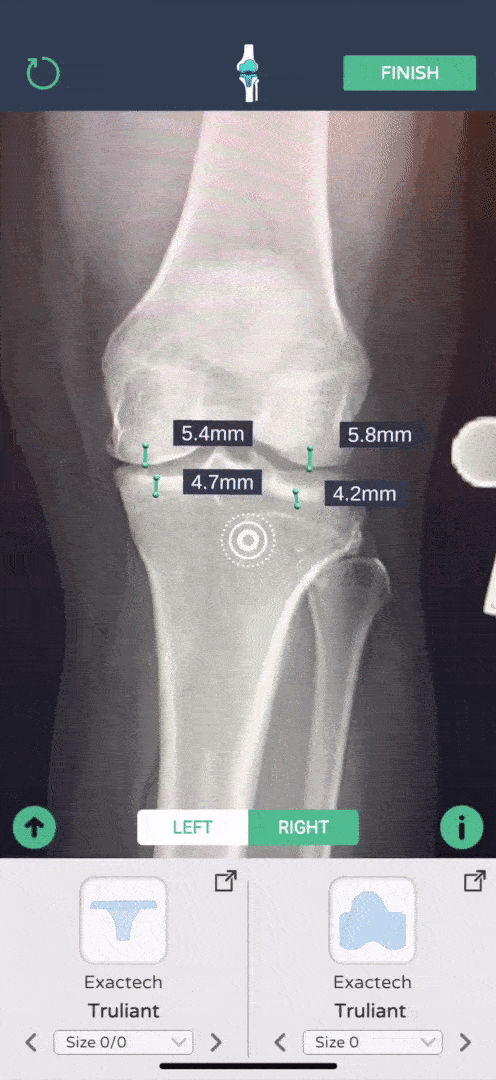
Tibial Slope
-
Once activated, measure the angle between 3 points by positioning the red target and pressing the red button to place each point.
-
To delete an angle, press the red minus button.
-
To continue templating, you must press the Tibial Slope button again to deactivate.

-
Once AR-target is active, press the implant image to make it appear on the screen.
-
Use the Left/Right button to change the orientation of the implants.
-
Drag the implant with 1 finger, and rotate the implant by moving 2 fingers either up or down on the screen to rotate the implant counter-clockwise (↑) or clockwise (↓).
-
To change the implant size, use the drop-down or arrows at the bottom of the screen.
Create your
template
1


2
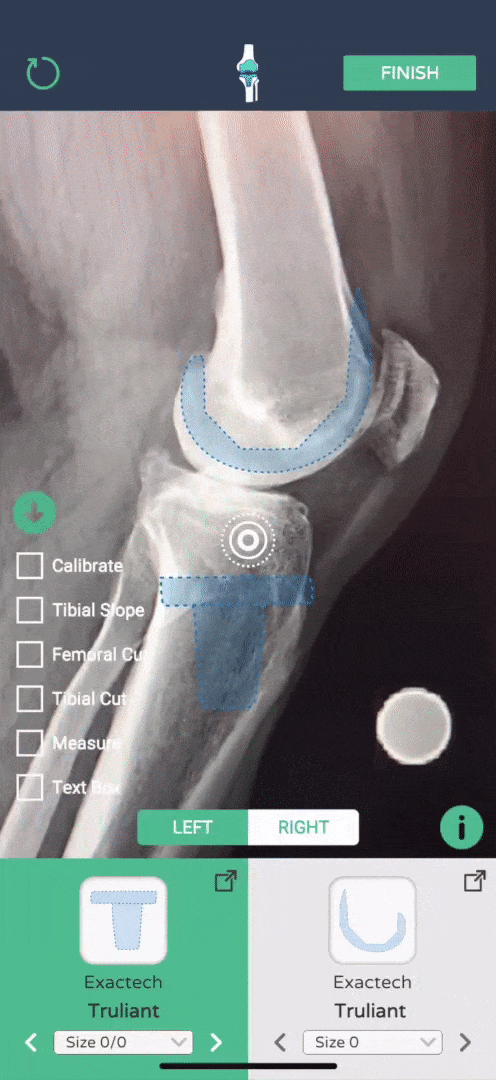
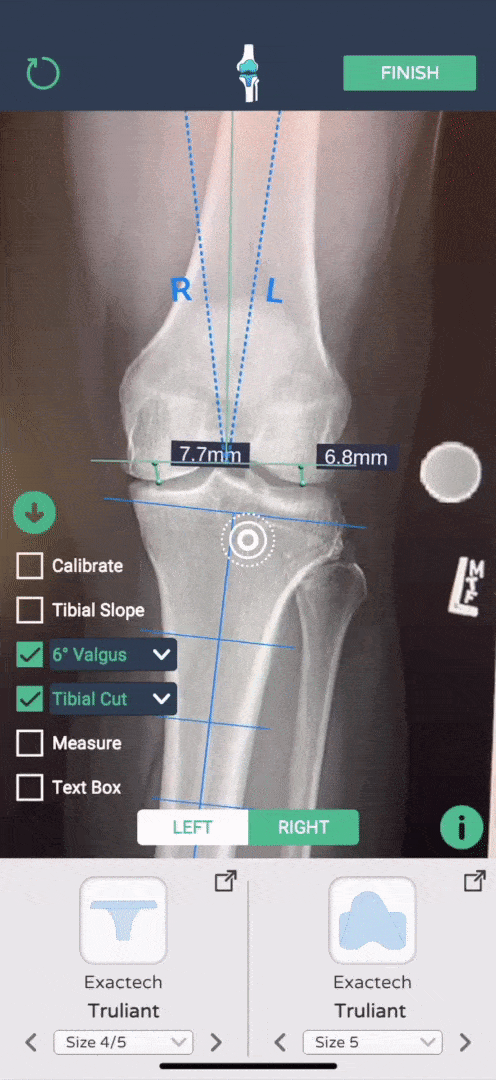
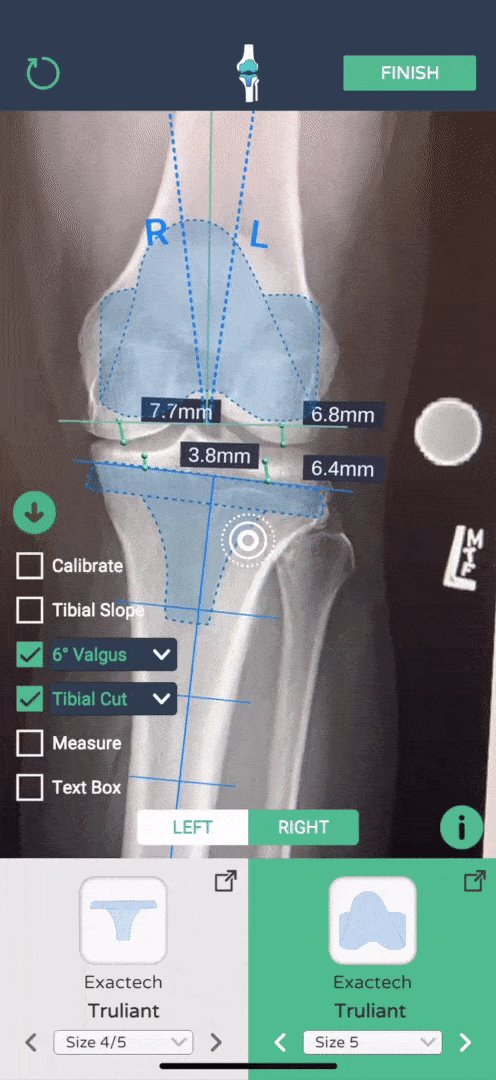
Knee Features
-
Press the up arrow to view additional features, and press the down arrow to minimize.
-
Select the Calibrate tool to recalibrate your x-ray.
-
The link icons open the surgical technique guide for the implant.
-
The i icon opens the tutorial.

-
Once activated, the femoral or tibial cutting guide will appear on the screen.
-
Use the drop-down to change the cutting guide.
-
Drag and rotate the cutting guide to its appropriate position along the femoral or tibial shaft.
-
Use the Measure function to measure your cuts.
-
To deactivate the cutting guide, press the green check box.
Femoral/Tibial Cutting Guide
4
5
5
Measure
-
Press the Measure button to activate.
-
Measure the distance between 2 points by positioning the red target and pressing the red button to place each point.
-
To delete a line, press the red minus button.
-
To continue templating, you must press the Measure button again to deactivate.


6
Text Box
-
Press the Text Box button to activate.
-
Press the text box to open the keyboard and type any notes for the case.